Posted on

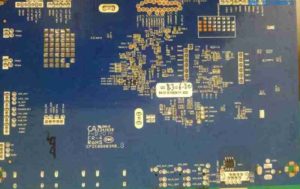
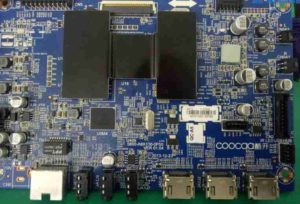
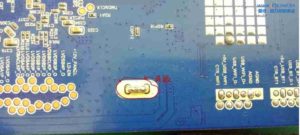
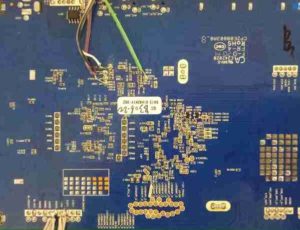
how to programme emmc using rt809h in a smart led tv

how to programme emmc using rt809h in a smart led tv


[media-credit id=1 align=”alignnone” width=”300″]emmc2[/media-credit]


[media-credit id=1 align=”alignnone” width=”300″]emmc 1[/media-credit]


[media-credit id=1 align=”alignnone” width=”300″]emmc[/media-credit]


[media-credit id=1 align=”alignnone” width=”300″]emmc3[/media-credit]


[media-credit id=1 align=”alignnone” width=”300″]emmc4[/media-credit]


[media-credit id=1 align=”alignnone” width=”300″]emmc4[/media-credit]


Posted on

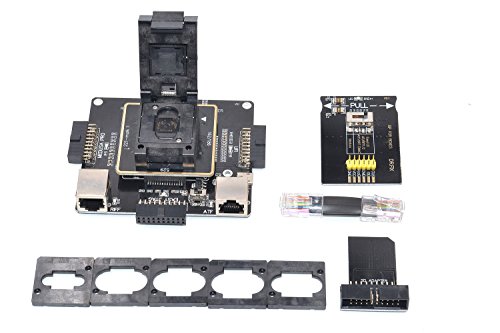
6in1 eMMC Repair Adapter Supports Medusa Pro/UFI/ATF/EASY JTAG/RIFF/eMMC Pro Universal eMMC Boxes Programmer for eMMC Read Write Programming (DR.Fix-eMMC Adapter Kit)

ALLSOCKET DR.Fix Kit-6in1 eMMC Repair Adapter Tool for Universal eMMC Boxes Programmer to Read and Write eMMC153/169, eMCP221,eMCP162/186, eMCP529 Flash Memory
We are original manufacturer, and look for distributor / dealer, contact us for more info if you’re interested(Email: amanda(@)allsocket.com)

Product Feature:
*One box one connector for all chip sizes
*No more connector board problems, stable, efficient and easy to operate
*No need to solder wires to eMMC Chip
*No more VCC problem
*compatible with most mainstream eMMC read / write programmer tools
*supports eMMC/eMCP packages: eMMC153/169, eMCP221,eMCP162/186, eMCP529 *Time saver: easy to operate and disassemble

Compatible with professional eMMC Box:
a. Z3X Easy-JTAG
b. Medusa Pro
c. UFI Box
d. ATF Box
e. Riff Box(Riff 1, Riff 2)
f. eMMC Pro, eMMC Booster
g. GPG EMMC
h. other common interface boxes

Package contained:
1*DR.Fix Kit-6in1 eMMC Repair Adapter
1* Set of Size Limiter/Frame(11*10, 11.5*13, 12*16, 12*18, 14*18, 15*15mm)
1* SD Convertor Adapter
1* RegisteredJack Cable
1* ISP Adapter

Posted on

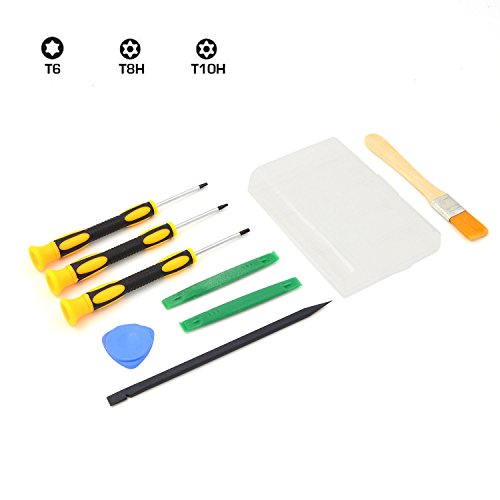
T8 T6 T10 Screwdriver Tool for Xbox One Xbox 360 PS3 PS4 Prying Kit Repair Tool

Product Description Professional Electronics Prying Tool Made From Engineered Non-Marring Plastic Polymer Will Prevent Damage to Your Controller While Saving Your Fingernails Torx 6, T8, T10 Screwdrivers for Xbox 360, Xbox one controller, PS3 PS4 and many other devices Professional Pry Opening tool will protect your controller and fingernails, makes your Repairing Cleaning more convenient High Quality Screwdrivers With Carbon Steel Shaft Will Last For Years And Fit Screws Properly Package includes: 1 * T8 screwdriver 1 * T6 screwdriver 1 * T10 screwdriver 1 * Triangle prying tool 2 * Double-ended prying tool 1 * Cleaning brush 1 * Long prying tool 1 * Screws storage case

Posted on

Samsung UA32EH5080R boot sound backlight not bright

Samsung UA32EH5080R boot sound backlight not bright

SAMflash rom | firmware bin file romflasher

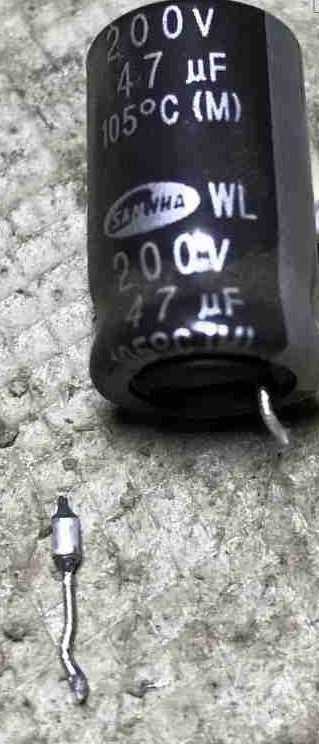
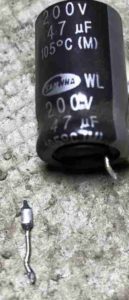
yesterday repair a Samsung UA32EH5080R sound power flashlight backlight is not lit all the shadow image search key backlight LED open circuit of this machine is found and a backlight power supply through one board see Board traces found that the power board has three voltage outputs Dm853 and DM854 are 13V and 5V rectifier output measurement The middle of the two diodes are normal voltage and then measure the dm851 dm852 rectifier output voltage of the two diodes Digital Multimeter Has been beating has been unable to properly display the number and then the two diodes in series behind the inductor and another diode D9101 voltage 240V so that the voltage is normal and then check other components for a long time has not found the problem Finally want to give up maintenance Direct buy board for nothing today and then picked up the study wanted to go is unable to figure out why the measurement dm851 dm852 The two diode rectifier output voltage has been beating Why is incomplete rectification before the online measurement of these two diodes No problem now again Open the two diodes side of the foot measurement or good after demolition That 200V 47uf capacitor filter capacitor removed to break off a foot do not know when it is disassembled or broken inside the previous and then find a 400V 47uf capacitor put on a long boot back to the machine came this machine Most of the luck to repair the current analysis should be before this capacitor is broken inside the rectifier filter is not completed so the backlight circuit does not work Remind counterparts do not think capacitor is not leak it is good or bad


[media-credit id=1 align=”alignnone” width=”129″]FILTER FAULT[/media-credit]


Posted on

LCD & LED TV Repair – No Picture No Image & Blank Black Screen Flashlight Test – Fix LCD & LED TVs

In this post we will be looking at how to troubleshoot the common symptom of No Picture on your TV screen in LED and LCD TVs. We will be using the flashlight test to help with the troubleshooting while determining the problem. This flashlight test will show how to identify if you have any video appearing on the screen and whether or not you have backlights. Within this test, we will show how to determine if the problem is a bad t-con board, bad main board or bad backlight inverters for LCD TVs or LED driver for LED TVs. Most LCD TVs are made up of a main board, a t-con board, power supply board and backlight inverters. Some TVs have one backlight inverter, some TVs have two backlight inverters and some have the backlight inverter built into the power supply board. Most LED TVs will have a t-con board, a power supply board, a main board and an LED Driver board. Some LED TVs will have the LED driver board built into the power supply board. If you have no picture on your screen, the first thing we will want to look at is to see if we have backlights or not.

You can do this in a few different ways. The first is by looking through the back of your TV and seeing if you can see white lights shinning through holes on the panel. You can do this a few different ways. The first is by looking through the vent holes on the back cover of your TV and seeing if you can see white lights shinning through the holes on the panel.

Be sure to turn off all the lights in the room. As you can see on the screen, we can see the backlight is on through the top vent on the TV. If it is too difficult to notice if your backlights are on or not, with the back cover still on, you will need to remove the back cover of your TV and look for the light shining through the panel. Here is what the chassis looks like with the back cover removed and the backlights working. Once you have determined if you have backlights or not, you can then move on to the next steps. If your backlights are working, but you have no image on the screen, that means the problem is either the t-con board or the main board. Next, you will want to see if you can hear audio. If you cannot hear audio, try and remember if you had audio immediately after the TV image went away on the screen the original time.

Or you can also cycle through the inputs to see if you can hear any audio on any of the inputs. For example you could connect your cable box to your TV and try to find the input for that cable box knowing that it would be sending audio to the TV. If you do have audio and you do have backlights, I recommend starting by replacing the t-con board as that will be the fix, the majority of the time. If you definitely have no audio and you do have backlights, then the problem could either be the t-con board or the main board. You will need to replace each board individually to see which one fixes the problem. If you do not have backlights, you will want to turn all of the lights off in the room and get a flashlight. Apply power to your TV and press the menu button on your remote to pull up the menu on the screen.

You will not be able to see the menu until you shine a flashlight on the screen. You may need to twist the flashlight and try different angles to be able to see the menu. As you can see on our screen, the menu shows up and you can even read the AV1 on the screen. This shows that the TV has no backlights, but the image is showing up on the screen, thus our inverter and LED driver is bad and our T-con and main board are good. You can see on our screen that I can turn the menu on and off and the image appears and then disappears. At this point you will want to replace the inverter or LED driver or the power supply if it has the inverter or LED driver on it. So as a brief overview, if your TV does have backlights and has audio, I recommend replacing the t-con board first. If your TV does have backlights but does not have audio, then it is either a bad t-con board or main board, and each board will need to be replaced individually to see which one fixes the problem.

If you don’t have backlights, but you see an image on the screen with the flashlight, that means that your main board and t-con board are good and that you will need to replace the backlight inverter or backlight inverters on your LCD TV and the LED Driver on your LED TV.

Posted on

LG LED TV No Backlights – 32LN5300 32LN5310 32LN5700 – Voltage Test Troubleshoot LEDs

In this POST  we will show how to troubleshoot if you have the symptom of no image or a blank screen, but you can see an image on the screen with a flashlight and you do have audio. This POST applies to the following power supply/LED board part number. EAY62810301 for LG TV model 32LN5300-UB. For LG TV models, 32LN5300-UB, 32LN5310-UB, 32LN5700-UH and panel number LC320DUE-SFR1. LEDs are panel specific, so you must match the panel sticker number, to be sure you have the correct replacement LEDs.

In this POST the tests that we are showing is checking the voltages. Testing the voltages will help to determine if the backlighting problem is being caused by the power supply/LED board, or the actual LEDs themselves. If you have not run the flashlight/backlight test, please click the link in the video to the flashlight test. If there is not a link to click, please go to our channel and find the flashlight test video. After running the flashlight test, if you determine that you do have an image on the screen, while using a flashlight, and you have audio, but no backlights, continue this troubleshooting video. In order to continue troubleshooting, you will need to have the skills experience and tools necessary to check voltages on the power supply/LED board.

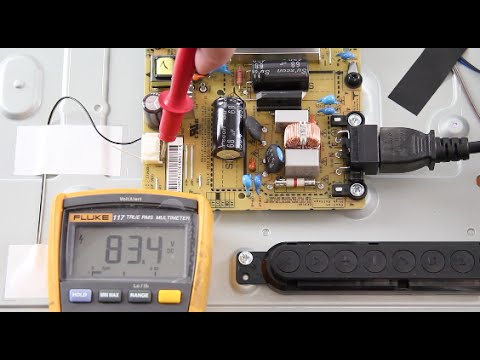
It is necessary that you take the proper precautions to protect yourself, as checking voltages can be dangerous on a TV that is powered on. I have begun by removing the screws and the back cover off my TV. We will be running the test on the power supply/LED board, here on the panel. We have highlighted this board in the video. As we take a closer look at the power supply/LED board, here is the cable connection that runs from the power supply to the LEDs. I will be checking the voltages at this connection. Since this is a smaller TV, we will only have one test point at the connection, which is labeled LED plus. Before I begin testing the points, I will plug in my TV and hit the power button on the side to turn it on. I will measure the voltage at the test point and it shows 84 volts, which is good. Before I begin testing the points, I will plug in my TV and hit the power button on the side to turn it on. If the voltages were at zero or lower that our normal numbers, that would show that there could be a problem with the power supply board.

I would want to first unplug the TV and then disconnect the LED cable and then retest the point. So, unplug the TV, disconnect the LED cable, plug the TV back in and turn it on and then retest the point. We get a reading higher than normal, which shows that the power supply is working and there is a problem with the LEDs. When we were getting a lower than normal reading or zeros, then the problem would be the power supply. Before I begin testing my points, I will plug in my TV and hit the power button on the side to turn it on. If the voltages show as much higher than our normal numbers, then you most likely have a problem with the LED strips. Before replacing the LED strips, you will want to disconnect the LED cable and retest. Once again, be sure to unplug the TV, then disconnect the LED cable, plug the TV back in, power it on and then retest the point.

We get a reading higher than normal, which shows that the power supply is working and there is a problem with the LEDs. If we were getting a lower than normal reading or zeros, then the problem would be the power supply. If you decide to replace the LEDs in your TV, here are a few recommendations… It is recommended that the replacement be done by a trained professional, as during the replacement process there is a chance you could damage the TV panel. If you damage your TV panel, it is not fixable and the TV will no longer operate as normal. Always replace all of the LED strips in your TV at the same time. If one of them has shorted out, there is a high likely-hood of another having the same problem. When searching for replacement LED strips, be sure to find the panel information for your TV and search using that information. Panel info can be located on a sticker on the panel or sometimes on a buffer board, sometimes in the TV. LED strips are panel specific and not model specific. If you do need to replace the power supply board, be sure to find a replacement that matches your original part number on the board.

Be sure to unplug your TV. You will need to start by removing all of the cables connected to the power supply. Then remove all of the screws holding the board to the TV panel. After removing the screws, you should be able to lift the board from the TV panel. Then, put your replacement board on the panel and secure it using the screws and then reconnect all of the cables..

As found on Youtube
Posted on

how to update firmware for MDS338STV 5.0 Android board

how to update firmware for MDS338STV 5.0


copy the XX.bin file to the U disk root directory (first formatted U disk).
2. In the off state of the U disk into the motherboard USB interface, and then power on, will automatically burn, burn the lights will stop flashing.
3. After about 30 seconds after the light flashes, that is, burn finished, and then power off, pull out the U disk.


Posted on

Apple iPad 2 MC769LL/A 9.7-Inch 16GB (Black) 1395 – Certified Refurbished

The all-new thinner and lighter design makes the Apple iPad 2 with Wi-Fi (Black, 16GB) even more comfortable to hold. The Refurbished Apple iPad 2 is even more powerful with the dual-core A5 chip, yet has the same 10 hours of battery life. With two cameras, you can make FaceTime video calls, record HD video, and put a twist on your snapshots in Photo Booth. Apple iPad 2 with Wi-Fi (Black, 16GB), Refurbished: Apple iPad 2 16GB available in 16GB, 32GB, 64GB 9.7-inch (diagonal) LED-backlit display with IPS technology Dual-core A5 chip Front and back cameras on the Refurbished Apple iPad 2 Up to 10 hours of battery life 802.11a/b/g/n Wi-Fi Bluetooth 2.1 + EDR technology

Posted on

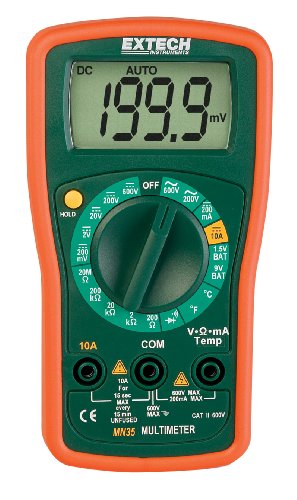
Extech MN35 Digital Mini MultiMeter

Conveniently sized Extech MN35 manual-ranging multimeter enables you to measure AC and DC voltage up to 600 Volts. It is designed with a large, easily readable LCD screen. Unit also provides resistance tests with continuity and diode functions, thermocouple temperature measurements up to 1400deg F and a data hold function that locks the reading on the display. Compact multimeter is ergonomically designed with curved corners. Features an integrated tilt stand and impact-resistant rubber holster for excellent grip and protection. Includes 9V battery, test leads, Type K thermocouple probe and instructions. DC Volts: 600, Accuracy: 0.5% DCV, 1.2% ACV, 1.5% DC current @ 200mA, Amps: 10, Functions (qty.): 8, Application: DC current, DCV, ACV, resistance, temperature, continuity/diode, Dimensions L x W x H (in.): 5 7/16 x 2 13/16 x 1 1/2, AC Volts: 600, Low Battery Indicator: Yes, Display Shows: 2,000 count

Posted on

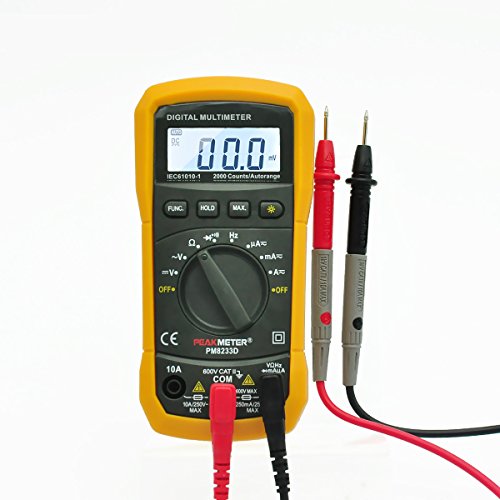
Digital Multimeter, PEAKMETER PM8233D Digital Auto Ranging Multimeter AC DC Voltage Tester Electric LCD DMM Ohmmeter Electric Frequency/Resistance Tester Meter with Test Leads Orange

PEAKMETER PM8233D Digital Multimeter meter designed for the electronics enthusiast or handyman. Auto-ranging design makes it easy to use single handed when testing – no need to switch ranges all the time!

Specifications:
DC Voltage:
200mV/2V/20V/200V, ±(0.5%+2)
600V, ±(0.8%+2)

AC Voltage:
2V/20V/200V/600V ±(1.0%+3)

DC Current:
200µA/2mA/20mA/200mA/10mA, ±(1.0%+3)
10A, ±(3%+3)

AC Current:
200µA/2mA/20mA/200mA(1.2%+3)
10A, ±(3%+3)

Resistance:
200Ω/2kΩ/20kΩ/200kΩ/2MΩ, ±(0.8%+2)
20MΩ, ±(1.0%+2)

Frequency: 20kHz, ±(1.0%+2)
Features:
Item model number:PM8233D
Display: 2000 Counts
Auto range: √
Data  hold: √
Back light: √
Diode test: √
Continuity: √
Maximum Value hold: √
Power supply: DV9V 6F22 Battery
size: 5.5 x 1.2 x 2.6 inches
Weight: Approx.110g
Safety Rating: IEC 61010-1,-2-030,EN61010-2-033,EN61326-1,CAT.III 600V

Package Include:
1 x PM8233D Digital Multimeter
2 x Test Lead
1 x User Manual

Posted on

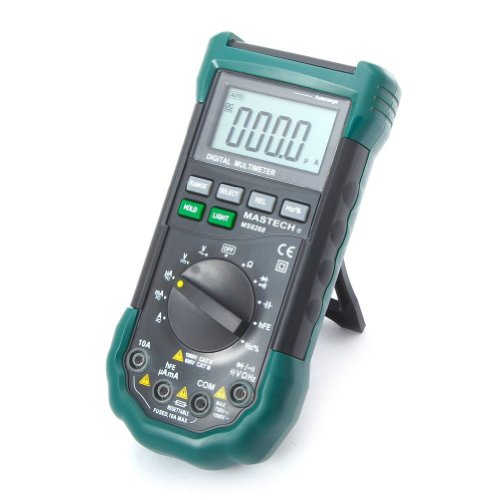
Mastech MS8268 Digital AC/DC Auto/Manual Range Digital Multimeter Meter

Product Features

AC/DC 1000V/10A 200KHz 200uF 40Mohm Relative Measurement hFE Diode Check Continuity

LED / Sound Warning when incorrect banana jacks are used relative to function switch setting

Auto and Manual Ranging with Relative measurement (all ranges except frequency)

All range fused (resettable) with 1 Year Warranty

Auto power off (could be disabled) & Blue LED Back-lit LCD display

Posted on

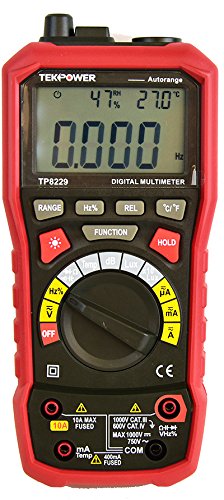
Tekpower TP8229 Auto-Range 5-in-1 Multi-functional Digital Multimeter,Lux,Sound Level and More,Better Mastech MS8229

The newly released Tekpower TP8229 DMM is a upgrade version of the Mastech MS8229, it combines a multimeter, a sound level meter, thermometer, luxmeter, humidity meter all in one. Also it is packed with many nice features such as temperature &, humidity display, sound and light warning for the jacks and back-lit LCD Screen.
Specifications:
DCV: 400m/4/40/400/1000V, +/- 0.7%,
ACV: 400m/4/40/400 +/- 0.8% 750V, +/- 1.0%,
DCA: 400µ/4m/40m/400m +/- 1.2% 4/10A, +/- 2.0%
ACA: 400µ/4m/40m/400m +/- 1.5 % 4/10A, +/- 3.0%,
Resistance: 400/4K/40K/400K/4M +/- 1.2% 40M, +/- 2.0%,
Capacitance: 40n/400n/4m/40m/100mF ±3.0%,
Frequency: 10/100/1K/10K/100KHz/200KHz ± 2.0%, >200KHz,reference only,
Temperature: -20 – 1000 degrees C (0?1,800 degrees F) +/- 3.0% (C/F selectable)
RH: 20?95%, +/- 5.0%,
Lux: 4,000/40,000 Lux, +/- 5.0%,
Sound dB: 40 ? 100dB, +/- 3.5% @ 94dB,
Diode test,
Continuity tester: Buzzer if resistance is less than 40 ohms.
Duty cycle: 0.1%-99.9% ± 3.0%.
Dimensions and Weight: 195 x 92 x 55mm, 400g.
Battery: 1.5 x 3 AAA.
Accessories: Test leads, K-Type thermo probe & User Manual

Posted on

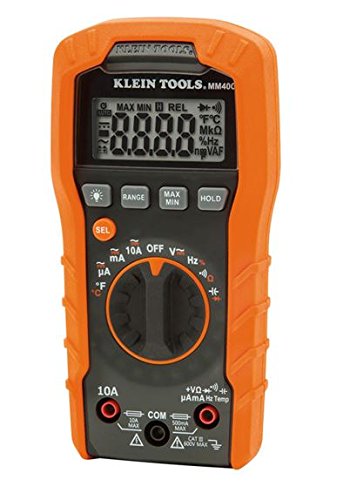
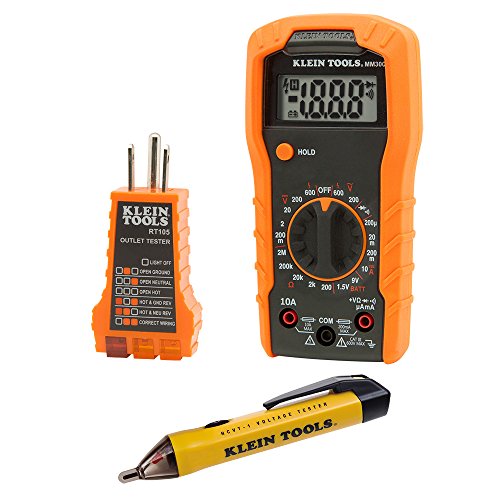
Klein Tools MM400 Auto Ranging Digital Multimeter

Klein Tools MM400 is an auto-ranging multimeter that measures AC/DC voltage, AC/DC current, and resistance. It can also measure temperature, capacitance, frequency, duty-cycle, and test diodes and continuity. Klein Tools’ Test and Measurement product line was exclusively designed from the ground up by electricians for electricians. Years of field research, combined with extensive input from electricians across America, inspired the development of meters and electrical testers loaded with innovative, time-saving features.

Posted on

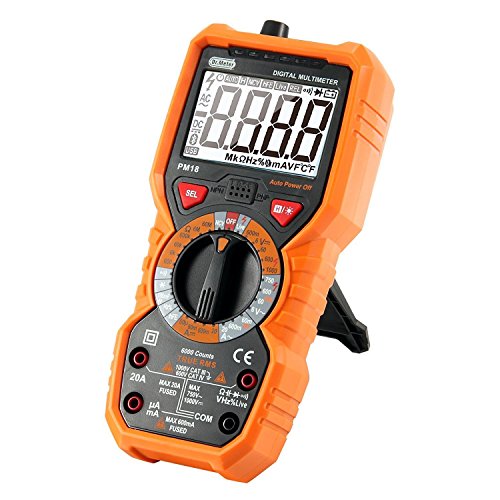
Dr.meter PM18 Auto-Ranging Digital Multimeter Measuring Instrument AC Voltage Detector Portable Amp/Ohm/Volt Test Meter Multi Tester w/ Diode and Continuity Test Scanner Electronic DIY Hand Tools

The Dr.meter PM18 Multimeter is a powerful digital device that can accurate measure AC/DC voltage and current, resistance, diode, transistor, continuity, frequency, capacitance and live line test. It is packed with advantageous features such as NCV detection, back LED light and backlit large LCD screen, greatly enhancing its functionality and performance. A compact and handy device to pinpoint everyday electrical issues around the house with safe and user-friendly operation.

Specifications
– DC voltage: 600mV/6V/60V/600V/1000V ±(0.5%+3)
– AC voltage: 6V/60V ±(0.8%+3), 600V/750V ± (1.0%+10)
– DC current: 60uA/60mA/600mA ±(0.8%+3), 20A ± (1.2%+3)
– AC current: 60mA/600mA ±(1.0%+3), 20A ± (1.5%+3)
– Resistance: 600Ω/6kΩ/60kΩ/600kΩ/6MΩ ±(0.8%+3), 60MΩ ±(1.2%+30)
– Frequency: 9.999Hz/99.99Hz/999.9Hz/9.999KHz/99.99KHz/999.9KHz/9.999MHz ± (1%+3)
– Capacitor: 6nF ±(4.0%+30), 60nF/600Nf/6uF/60uF/600uF/6mF ±(4%+3), 100mF ±(5%+3)
– Display: LCD, 6000 counts 
– Fuse protection: FF630mA/250V for mA position, FF20A/250V for A position
– Sampling rate: about 3 times/second.
– Over range indication: “OL” displayed on the LCD
– Polarity indication: “-” auto displayed.
– Low battery indication: low battery mark displayed on the LCD
– Battery: 4 x 1.5V AA battery(included)
– Dimension: 190 x 89 x 50 mm

Notes: 
– Do not connect it to the voltage over 1000VDC or 750VAC 
– Make sure not connect the error measuring range 
– Please remove the test lead and cut off the power before replacing battery and fuse.

Package Contents
1 x Dr.meter PM18 Multimeter
1 x Test Lead
4 x 1.5V AA Battery
1 x User Manual
1 x Warranty Card 

Posted on

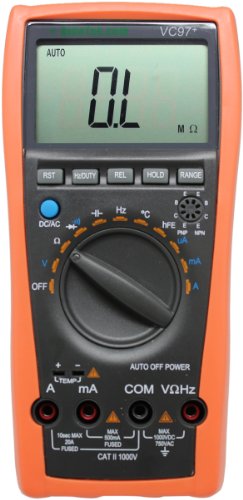
AideTek VC97+ Digital Auto Range Multimeter Tester Capacitor Amp Voltage AC DC Temp Diode Buzz Frequency

Very reliable and most cost-effective auto -range DMM on the market, sold several thousands every month, it test AC DC Voltage, Amp, Diode, he, Continuity, Resistance, Capacitance, Frequency, Temp data hold, auto power offer, function protect, Max display: 4000 DCV: 400mV/4V/40V/400V/1000V, accuracy: 0.5-Percent+4 ACV: 4V/40V/400V/1000V accuracy: 0.8-Percent+6 DCA: 400uA/4000uA/40mA/400mA/20A accuracy: 1.0-Percent+5 ACA: 400uA/4000uA/40mA/400mA/20A accuracy: 1.5-Percent+5 Resistance:400?/4k?/40k?/400k?/4M?/40M? accuracy: 0.8-Percent+1 Capacitance: 4nF/40nF/ 400nF/4uF/40uF/200uF accuracy: 3.5-Percent+8 Frequency: 100Hz/1kHz/10kHz/100kHz/1MHz/30MHz accuracy: 0.5-Percent+4 Centigrade temperature: -40C1000C accuracy: 0.8-Percent+4 Standard accessories: 1) Banana Test leads and temperature probe. 2) English manual; 3) Portable bag; 4) Banana plug to Alligator clip test leads; Click here to download the English Manual: www.aidetek.com/New_products_info/Datasheet/Vichy/VC97+.pdf Brand New with 1 year USA warranty, support e-mail: supportataidetek.com.

Posted on

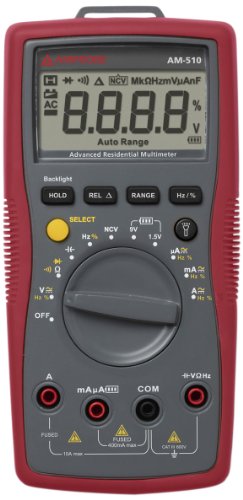
Amprobe AM-510 Commercial/Residential Multimeter with Non-Contact Voltage Detection with a NIST-Traceable Calibration Certificate with Data

The am-510 commercial/residential Multimeter is designed for light commercial and advanced residential applications. It is an Auto- or manual-ranging meter for measuring current, Voltage, resistance, capacitance, frequency, microamps, and duty cycles in commercial, home repair, automotive and electrical testing applications. It comes with non-contact Voltage detection, built-in flash light, bright backlit display and Auto power-off feature. The am-510 measures alternating current (AC) and direct current (DC) to 10 amps, AC Voltage and DC Voltage to 600 volts (V), resistance to 40 megaohms, capacitance to 100 microfarads, frequency to 10 megahertz (MHz), micro current to 4,000 microamps, and duty cycles to 99 percent . The battery Test feature checks the amount of charge remaining in standard 1.5V and 9V batteries. The microamp reading identifies current changes in flame detector applications. The backlit liquid crystal display (LCD) is visible in low light. The relative zero mode stores a reading in Memory to use as a zero point for subsequent readings, allowing for quick Comparison of readings. The hold function keeps a reading on the display, even after the meter is disconnected. Audible continuity confirms that the circuit is capable of conducting electricity and the diode Test detects whether the circuit’s diodes work properly. An Auto power-off mode turns off the unit after 30 minutes of non-use to conserve the battery, and a low-battery indicator signals when the meter’s batteries need to be replaced. The back of the meter has a tilt stand that allows the meter to be propped on a surface for hands-free use. A probe holder on the Body of the meter stores probes when not in use. It meets international electro technical commission (IEC) Safety standard 61010 and is certified for category III installations up to 600V. The am-510 comes with a set of detachable Test leads.